Skip to content

Anatomical Models

Working with models from the Virtual Population

60 Topics 283 Posts
  • anisotropy of electrical conductivity of muscle tissue

    2
    0 Votes
    2 Posts
    122 Views
    AntoninoMCA
    Hi @fangohr, this is a very important question, especially considering the strong electrical anisotropy of muscle tissue. Unfortunately, the whole-body anatomical models provided with Sim4Life do not include DTI information that could be used to assign anisotropic properties. Therefore, if you want to model tissue anisotropy, alternative approaches are required. Some of these may be reasonable when the stimulation is regional, i.e. limited to a small number of muscles. In principle, Sim4Life allows you to model heterogeneous tissue anisotropy in two main ways. 1) Using subject-specific DTI data If you are working with a personalized model (e.g. a head model) and have subject-specific DWI data, you can proceed as follows: a. Reconstruct the DTI data from the DWI, bvec, and bval files (all standard outputs of MRI DTI). b. Convert the DTI into a conductivity tensor field using the Tuch model [1] 
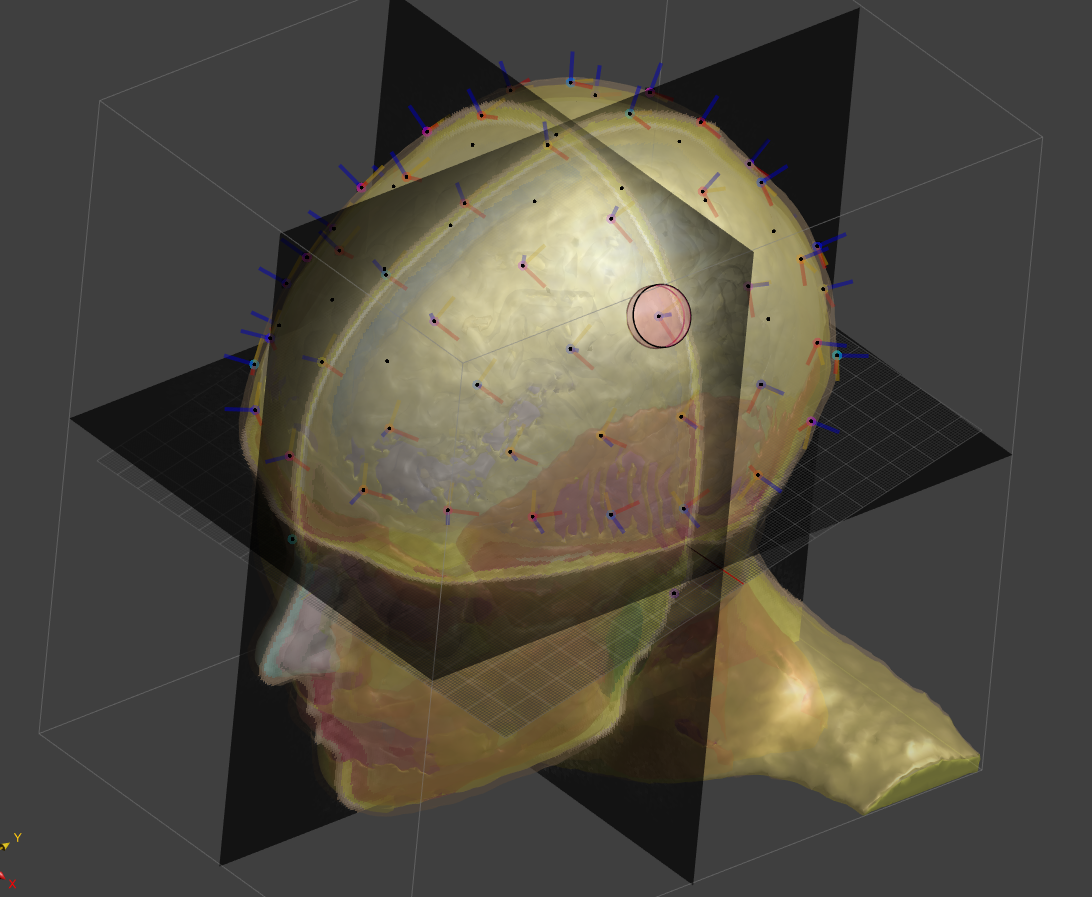
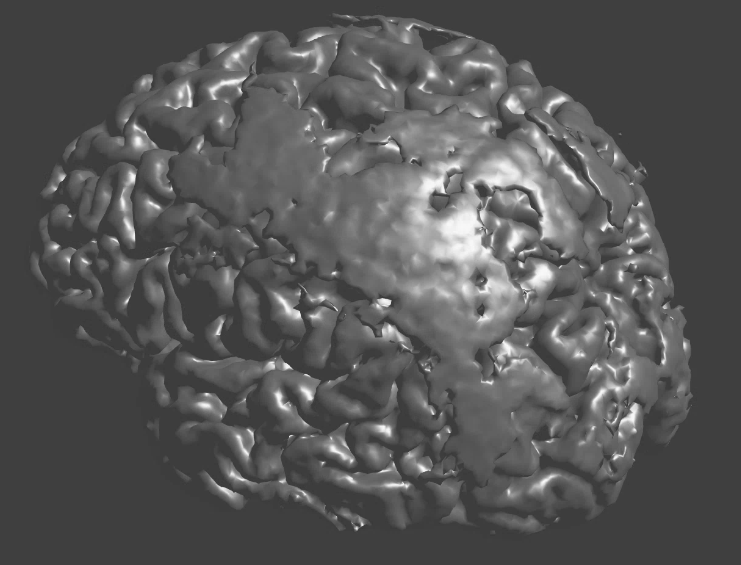
Both steps are fully implemented in Sim4Life. Step (1) is performed via the Python API (please refer to the “Anisotropic Conductivity Tutorial” in the Examples section), while step (2) can be executed either through the Python API or directly in the GUI. The attached animation shows how processed DTI data can be converted into tissue anisotropy data structure using the Tuch approach, and assigned to WM conductivity. 2) Without DTI data (assumption-based approach) - Using an E-field distribution & Cylindrical Tensor Model If DTI data are not available, an alternative approach is possible, but its validity is entirely your responsibility. Sim4Life allows you to create a conductivity tensor field from a 3D vector field by assuming cylindrical symmetry of the conductivity tensor. In this case, the principal tensor direction is assigned according to the local direction of the vector field, and only the longitudinal (parallel to the fibers) and radial (perpendicular to the fibers) conductivities need to be specified (you can find these values in the IT'IS LF Database (https://itis.swiss/virtual-population/tissue-properties/database/low-frequency-conductivity/) The input vector field can be, for example, an E-field computed with any EM solver in Sim4Life, or a vector field generated via the Python API. One possible strategy would be to create an E-field aligned with the muscle fibers. This requires assumptions about muscle fiber organization — for instance, that fibers follow a diffusion-like process and extend from tendon to tendon. Under such assumptions, fiber directions could be approximated using an E-field computed with the QS-Ohmic Current solver, where the muscle is modeled as a homogeneous tissue and the tendons at the extremities act as Dirichlet boundary conditions. Please note that this is not a ready-to-use recipe. This approach may be reasonable for certain muscles and unsuitable for others, and it represents a strong simplification of the underlying physiology. You will need to define a plausible fiber model and then use Sim4Life to test and validate your assumptions. I hope this helps. If you need further or more specific assistance, please feel free to write again or contact the Sim4Life support team directly. All the best, Antonino [1] Tuch, D. S., et al. Conductivity tensor mapping of the human brain using diffusion tensor MRI. Proceedings of the National Academy of Sciences, 98(20), 11697–11701 (2001). [image: 1769594990533-anisotropy_from_dti_4.gif]
  • 0 Votes
    4 Posts
    2k Views
    T
    hi,bryn. Upon discovering your post, I downloaded the latest software version—9.2.1.19976. However, I was unable to locate the H. Personalised Transcutaneous Spinal Cord Stimulator. Might you kindly advise where I might find this?@bryn
  • 0 Votes
    7 Posts
    1k Views
    T
    @halder I hope this message finds you well. I am currently conducting a temporal interference (TI) simulation using the LF Electro Ohmic Quasi-Static solver in Sim4Life, and I have encountered an issue regarding the electric field distribution at the electrode–skin interface. Here are the specific settings I used: There are four electrodes in total. For the first pair of stimulating electrodes, I assigned PEC material type to the other two electrodes (which are not used for stimulation). The stimulating electrodes were not assigned a material type; instead, I only applied Dirichlet boundary conditions to them. In the voxel settings, the four electrodes were set with priority = 1, and the Duke model with priority = 0. For the second pair of electrodes, I applied the same procedure accordingly. However, during post-processing, I noticed that the region where the electrodes overlap with the skin shows no electric field distribution, which seems physically unreasonable. Could you please advise if there might be an issue with my setup or if there are additional steps required to properly model the electrode–skin contact in TI simulations? Thank you very much for your time and support. I truly appreciate your help.
  • How to get spatial coordinate information of an anatomical structure?

    1
    0 Votes
    1 Posts
    580 Views
    No one has replied
  • Drawing Toe Nails or other Details in Anatomical Model

    4
    2 Votes
    4 Posts
    1k Views
    R
    @bryn ahh, I see. Thank you so much!
  • Importing anatomical models in the python script

    3
    0 Votes
    3 Posts
    1k Views
    M
    I ended up creating my Duke model in a separate script, where I first cloned him as static. Then I removed part of the body not relevant to me by boolean subtraction (entity by entity) and finally export the remain static model to a sab file, which I load in my main script instead of the entire Duke. It has been this confusion about entities and groups and what not disturbing the flow. Thanks for your suggestions bryn
  • ViP Shells for Sim4Life Users

    4
    0 Votes
    4 Posts
    2k Views
    V
    That's helpful. Thank you for the detailed steps @bryn.
  • Determine distance between bones and Antenna

    2
    0 Votes
    2 Posts
    1k Views
    brynB
    To measure the shortest distance between two entities, you can use the Python API: import XCoreModeling as xcm shell = xcm.GetActiveModel().SelectedEntities[0] coil = xcm.GetActiveModel().SelectedEntities[1] res = xcm.GetEntityEntityDistance(shell, coil) print(f"Shortest distance shell-coil: {res[0].Distance}") p1 = xcm.CreatePoint(res[0].ClosestPosition) p1.Name = "Point on Shell" p2 = xcm.CreatePoint(res[1].ClosestPosition) p2.Name = "Point on Coil" # This line is just to visualize where the measured distance was taken line = xcm.CreatePolyLine([res[0].ClosestPosition, res[1].ClosestPosition]) This would create something like this: [image: 1747752108672-c17b7bff-2d64-408c-88a7-fd83a4dadfdb-image.png] Some other snippets are shared here: https://forum.zmt.swiss/topic/565/geometry-modeling-snapping-to-endpoints-in-python-api/3?_=1747746585465
  • Modification of Tissue Volumes in the Anatomical Model

    3
    0 Votes
    3 Posts
    1k Views
    brynB
    I would add that in the first approach you might change the tissue property of the original bladder to something else, e.g. fat, to get the desired effect of shrinking or stretching the bladder without creating air holes. Btw, you can measure the volume of a tissue surface in the modeler using the measure tool.
  • Evaluation of head segmentation quality

    7
    0 Votes
    7 Posts
    2k Views
    G
    Okay, I will take those considerations into account. Thanks for the fast reply!
  • Automatic Head Model including 1010-System / Electrode Placement

    30
    1 Votes
    30 Posts
    38k Views
    L
    @bryn Is the 6.8 displayed on the color bar the actual maximum field strength value? I exported the values and found that the maximum is around 5.9 instead. [image: 1735124755536-42fb974e-d830-42c2-8373-84c85ee63339-image.png]
  • Morphing Tool: How it can be used to modify the shape of the heart

    1
    0 Votes
    1 Posts
    756 Views
    No one has replied
  • Head tissue segmentation

    1
    0 Votes
    1 Posts
    627 Views
    No one has replied
  • Brain atlas

    1
    0 Votes
    1 Posts
    572 Views
    No one has replied
  • Neck flexion with Jeduk V4

    5
    0 Votes
    5 Posts
    2k Views
    N
    @bryn Thank you again for your reply and the posture file!
  • Can I scale a ViP model? Why is the model "locked"?

    1
    0 Votes
    1 Posts
    702 Views
    No one has replied
  • Poser API documentation?

    3
    0 Votes
    3 Posts
    2k Views
    S
    Thank you for the detailed answer!
  • Pose User-Defined Surfaces/Entities

    39
    2 Votes
    39 Posts
    52k Views
    V
    Hi Bryn, I would like to ask a question regarding posing. My aim is to detect the variation in bone position from the skin in different poses (hypothesis being: as the soft tissues deform, the bone wont always be at the same position wrt the skin). I currently have 8 antennas placed around the skin which are supposed to mimic wearable antennas and I would like to move these antennas along with the pose. But if I link these antennas to the bone using "link-parent tool", the bone is always at the same location wrt to the bone irrespective of the pose. But I cannot link the antennas wrt to the skin as the antennas dont move with the pose. How can I do this? I would like the antennas which are placed around the skin to similar to the skin rather than the bone? Based on the first video in this chain, triangular meshes can be posed similar to the body. If I convert the antennas to meshes and then pose it, will I be getting the same issue i.e the bone is always at the same location wrt to the antennas? Thanks
  • Anatomical model extraction and dimension

    7
    1 Votes
    7 Posts
    3k Views
    A
    Thank You, It really works.
  • Subdivide the structure of SKIN into stratum corneum, epidermis

    3
    0 Votes
    3 Posts
    2k Views
    M
    Thank you! That helps a lot.